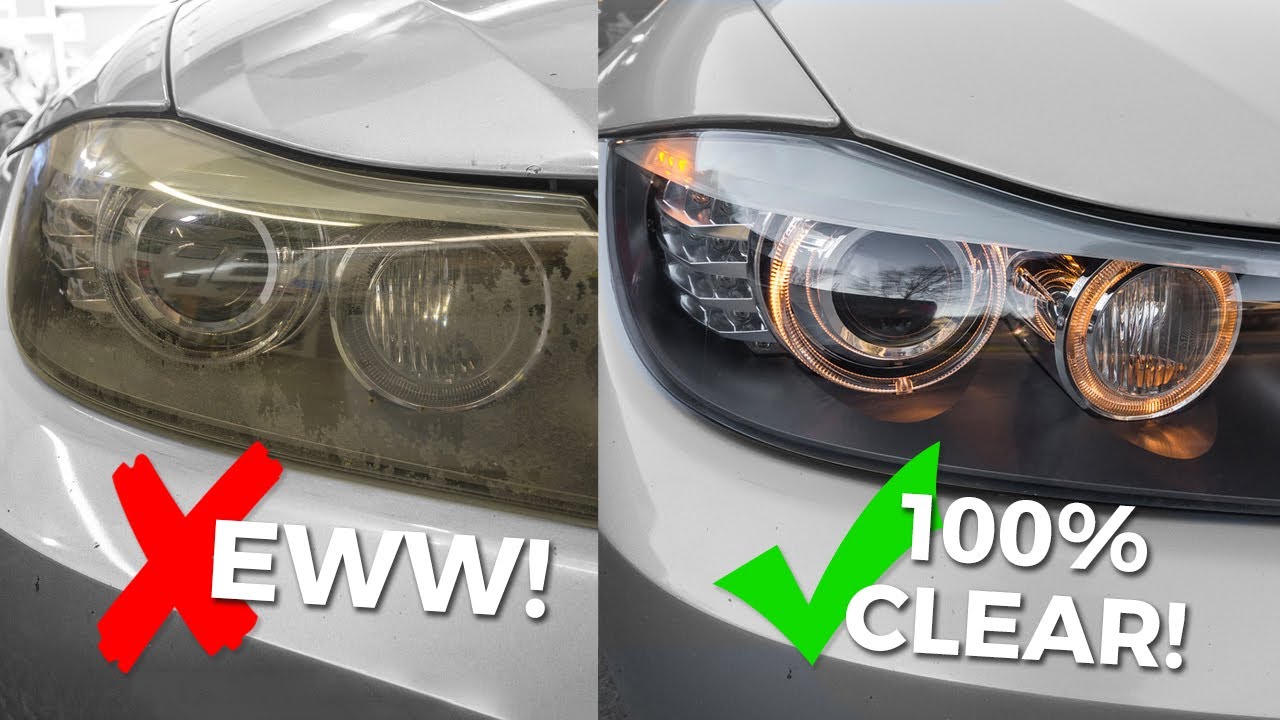
Do you find that no matter how hard you try, you just can’t get the fog off your car’s headlights? Or, perhaps, you’ve seen pools of water collecting inside your headlights. If this describes you, know that you are not alone. Getting the interior of headlights free of dust and moisture is a common concern.
A common concern for drivers worldwide is dimmed headlights. They are a safety hazard and an eyesore. If your headlights aren’t clean, you might not be able to see speed bumps, animals, or other obstacles on the road in time.
They make it difficult for other drivers to see you, especially in extreme conditions. Additionally, hazy headlights are grounds for failing a vehicle inspection. As a result, it doesn’t matter if there’s dust on the inside of your lenses or condensation; both pose major safety risks.
You’re in luck if you’ve been searching for a solution to one of those issues. If any of those things have happened to you, don’t worry; I have advice on how to fix it.
Cleaning Inside Headlight (1st Method)
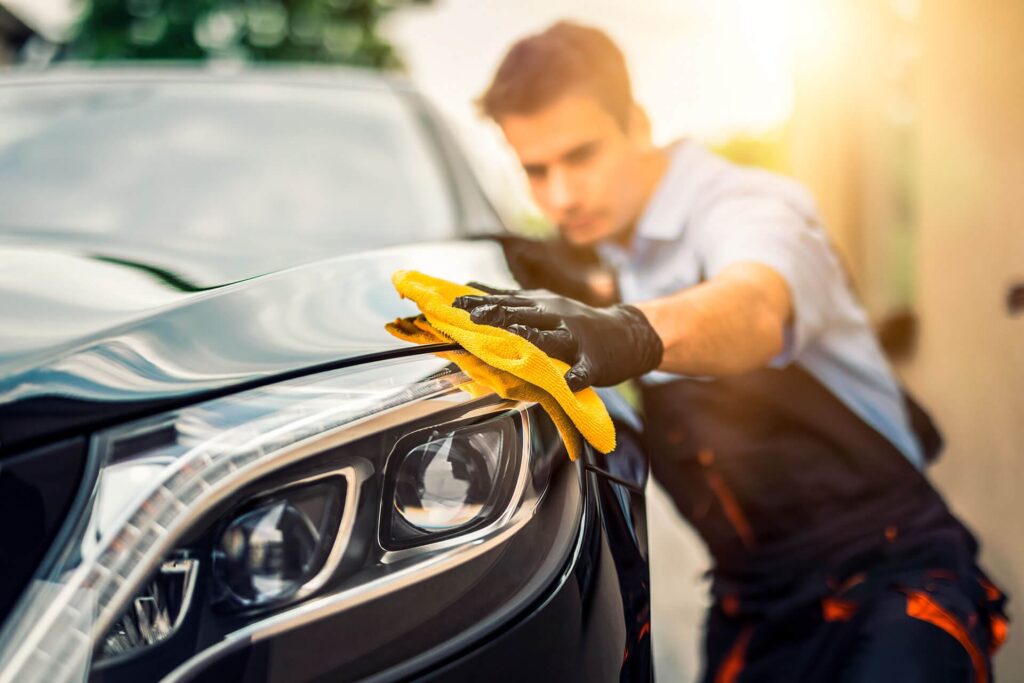
Headlights that are sealed are quite practical. However, leaving your super headlamps moist and dirty is not ideal. So, let’s tackle the process of cleaning the sealed headlights of your car.
Needed Tools:
- Warm water
- Screwdriver
- Penetrating solvent / Grease
- Detergent & Toothpaste
- Dry Towel
- A Sponge
- Headlight Lens Restoration Kit (Optional)
1. Lift The Car’s Hood
In order to reach the headlights and clean them, you will need to raise the car hood. You must find the screws responsible for the headlight covers in order to reach to the inside of the headlight.
2. Unscrew the Headlight Covers
There is not a single car in existence that does not have some sort of covering over the headlight. In order to clean the headlight, you’ll need to remove that cover. To separate the housing from the headlights, use a screwdriver from your toolkit to undo the screws.
3. Loosen the Screws
In order to remove the screws holding the headlights in place, you must first loosen them. To loosen the screws without causing as much wear, put a little amount of penetrating solvent on them first. You may use grease oil as a substitute if you don’t have the spray.
4. Remove the Headlight
Once you’ve removed the screws, you may disconnect the headlight from the wire connector, which has hooks at the rear. To accomplish this, carefully remove the vessel’s headlights by lowering them.
5. Prepare The Cleaning Solution
After you take off the cover, you may examine the lens. Currently, you should get ready your cleaning solution. It is recommended to use some high-quality automotive soap; if not available, adding some warm water to your detergent can help. To remove oxidation from inner headlights, you can also use toothpaste.
6. Give a Wash to the Headlight
Next, you’ll take a cleaning sponge, dampen it with the cleaning solution, and wipe the lens clean. Be careful not to damage the lens by using excessive power while cleaning it. The next step is to wipe the interior of the sealed headlight until all the dirt, debris, cloudiness, and particles are gone.
Once you have it looking clean, you can check for oxidation marks, which your toothpaste will remove. First, spread some toothpaste over the lens and leave it there for a few minutes. You then use the same light motion to remove it.
7. Get Your Headlight Lens Restoration Kit (Extra Step)
Remove the soap residue by rinsing the headlights, then wipe them dry with a microfiber towel. Please wait five minutes and then collect your restoration kit.
In the kit, you will get a cleaning wipe specifically for the headlight lenses; use this to remove any dirt or debris. Once you open the package, you’ll find some paper towels. After you’ve finished washing the headlights, you should dry them with some paper towels.
One by one, you should use the packets from the repair kit. Wait 30 minutes so the headlights can dry off completely. Headlights will be bright and clear after being exposed to dry air for 30 minutes.
8. Reassemble the Headlights
Once you’ve finished cleaning everything, you can finish restoring the headlights from the inside by replacing the sealed back and reconnecting the wire using the prongs. Your newly sealed, in-cabin headlamps will now provide a clean and sparkling appearance.
This video will help you in removing your car’s headlight:
Cleaning Inside Headlight Using Magnets (2nd Method)
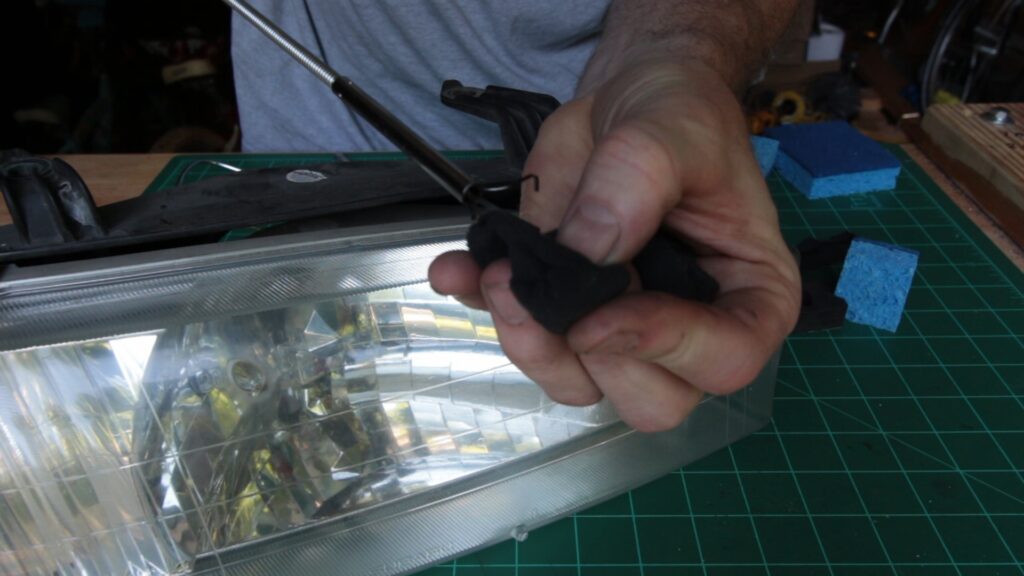
When headlights get dirty on the interior, most people think they need to be taken apart to clean the lenses. Although this can be successful, doing so comes with some danger since you’ll have to break the watertight seal that keeps the lens in place.
When you try to put everything back together, you might not be able to reseal it fully. If you did that, water and dirt would be able to enter your headlamp, eventually making it dysfunctional. In the end, you’d have to hire a pro to aid you, and that won’t come cheap.
Thankfully, headlights can be cleaned thoroughly without disassembling them using magnets and following these steps:
Needed Tools:
- A Sponge or cotton cloth
- 2 Strong Magnets
- Scissor or knife
- Needle and thread / Hot gun
- Screwdriver
- Dry towel
- Cleaning agent / Alcohol
- Grabber / magnetic pick-up tool / Stick
1. Prepare the Cleaning Sponge
Making a magnetic cleaning tool is the first step since you need to clean the interior of the headlamp without disassembling it. It must be soft enough not to scratch the lens or the reflecting headlamp surface yet small enough to fit inside the whole housing.
Choose something soft, such as an old T-shirt or a tiny, nonabrasive sponge, for this purpose. To begin, use scissors or a knife to cut out a rectangular shape from the cloth that is around the size of your hand. If you decide to use a sponge, make sure to trim it to a size just larger than the magnets you have on hand. Inside the small sponge slice, you should also create a pocket.
2. Insert the Magnet
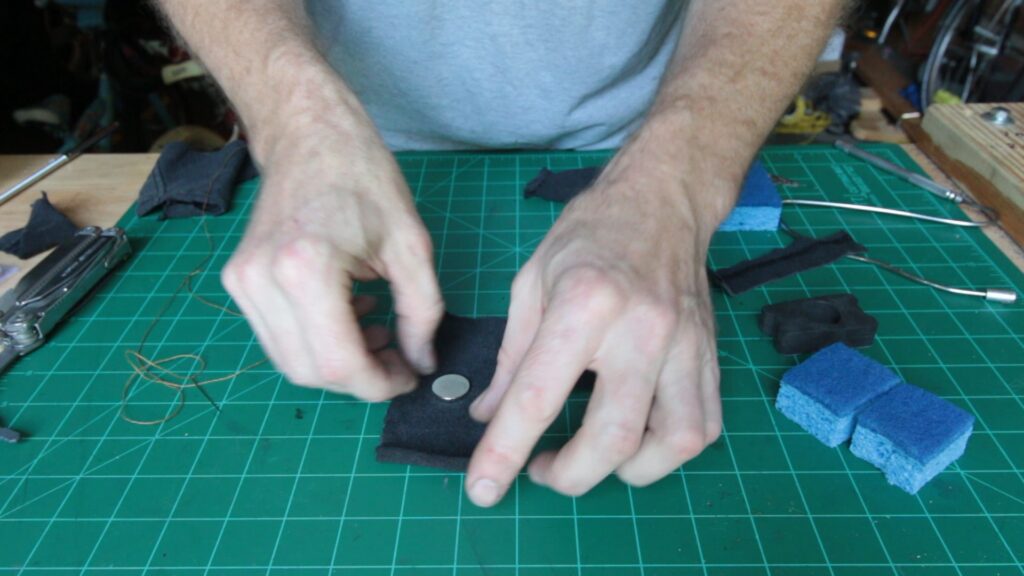
The next step is to insert a magnet into the sponge’s pocket. An alternative is to place the magnet in the center of the cotton fabric and wrap it up completely. Another magnet may be used in the same way, or you can just wrap it in some paper towel. That way, the lens won’t get scratched when you eventually use it.
The next step is to use a needle and thread to sew the fabric or sponge pocket shut, preventing the magnet from escaping. This may also be done with hot glue; just be sure to let it cool completely before cleaning the headlamp.
3. Get the Headlight Out
Repeat the same steps of removing the headlight explained before. You should put the headlamp in a safe location, such as on a dry towel after you have removed it. It’s time to take the light bulb out. Hold it by the base, as the glass bulb is fragile and should not be touched.
4. Insert the Magnetic Cleaning Tool
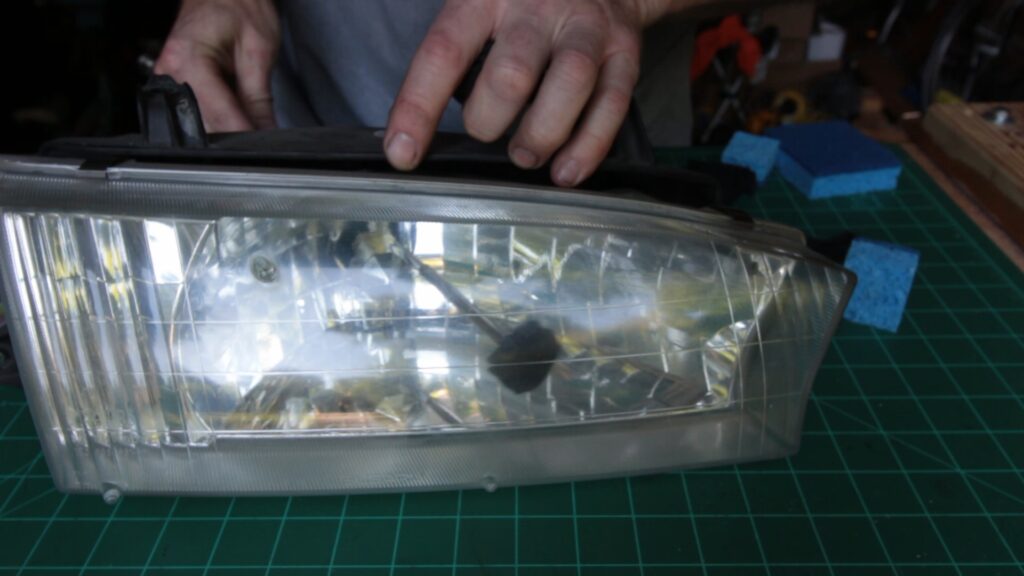
At this stage, a magnetic pick-up tool or a small grabber tool would come in handy. Put the magnetic sponge or cloth against the inner surface of the lens by inserting it through the lamp’s opening and pressing it in. Keep it there until you’ve attached the other magnet to the lens’s outside. If you don’t, the magnet within the headlamp may latch onto the nearest metal object, perhaps causing harm. Once the magnets have attracted to each other, you can remove the picker.
5. Start the Cleaning Process
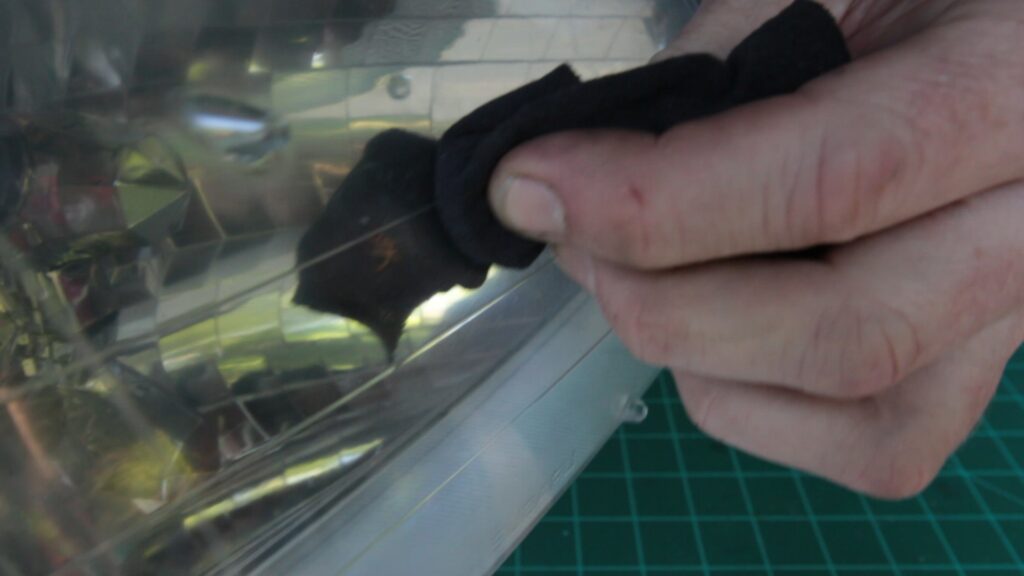
Time to wipe the lens clean. If you rock the outer magnet from side to side, the inner magnet will be attracted to the outer magnet in the same way. Lens damage is prevented by the soft, delicate materials that encase both magnets. It’s easy to see the effects right away and know what areas still need cleaning.
You might have to wet the sponge with a cleaning solution if the dirt is really stubborn. It’s probably a good idea to wear gloves to keep your skin safe from the chemicals. My suggestion is to dampen it with rubbing alcohol, which is both antibacterial and leaves no trace.
6. Replace the Headlight
After cleaning the headlight, replace the bulb gently in the casing and reattach the unit to the vehicle. Put back in place any screws or plugs you removed at the beginning, and you should be all set. Watch the following video by Charles Cranford to see the process in action:
What Causes Water and Dirt Buildup Inside of Headlights?
Headlights are constantly becoming smudged. Most exterior dirt and mud are readily removed by a quick rinse. There are plenty of cleaning methods that will work, even if the dirt is stubborn. To dissolve the dirt, you can use any number of common home products, such as rubbing alcohol, vinegar, or toothpaste.
On the other hand, what if just wiping off the outside of the lights isn’t enough? In that situation, the interior is contaminated with moisture or dust. Several things can cause such to occur.
Headlights Scratches and Fractures
Your headlights have likely been damaged by road gravel. Road debris causes significant wear and tear by scratching and eventually destroying their protective layer. Scratched or broken lenses let dust and moisture into the headlights and reduce their effectiveness.
Headlights Rear Vents
Another explanation may be that road dirt and moisture leak in through the vents behind the headlights. They serve the purpose of letting air flow into and out of the headlights, balancing their temperature with that of the surrounding area. Water vapor and debris flakes may also be drawn in during the process.
Why Cleaning Your Car Headlights is Important?
Even though having clean car headlights is an obvious want for car lovers, this is also important for many things.
Increased Safety
One of the most notable advantages of having a clean headlight is safety. By cleaning this auto component, you remove dirt, dust, and other foreign things that might interfere with the lighting. By doing this, you increase your visibility at night and in bad weather, protecting your safety and the safety of other road users.
Enhanced Car Beauty
Your car’s appearance and general look are significantly improved by its headlights. The car will look its best if the headlights are in good condition. It is beneficial to have a reasonable asking price when you want to sell it since the car generally seems well-kept.
Maintain The Original Headlights
Cleaning the lights extends their life and allows you to use them without worry for a very long time. This makes it easy for you to preserve the original headlights. You also avoid the expense of repairs and replacements. Since it still has its original components, the car might potentially sell for a reasonable price.
What If I Don’t Clean My Car Headlights?
If you don’t clean your headlights, you could face some of the following drawbacks.
Car Beauty
For personal appearance and to demonstrate your responsibility, your car must always seem clean. Even if the rest of the car is perfect, unclean headlights will stand out like sore thumbs. They will take on a hue that will dramatically contrast with that of your car if you don’t keep them clean.
Safety Concerns
Your headlights need to be in good condition, including being clean, for effectiveness when driving, especially at night. You will have less visibility due to collected dust and perhaps fog.
It is a risky situation that raises the possibility of collisions for both you and other drivers.
Against the Law
Due to operating a vehicle that endangers other road users, you can potentially find yourself in legal trouble. The poor lights of the vehicle, particularly at night, are a concern for the authorities since it might cause traffic accidents.
Frequently Asked Questions
Q: Is it possible to clean the inside of a headlight?
A: Put one of the magnets inside the headlight with the aid of a gripping tool, then use the other magnet to guide it. The coating will cleanly remove all dirt and filth as you move the magnet. Use the grabbing tool to take the magnet out after cleaning.
Q: Why are my headlights cloudy on the inside?
A: Headlights are built with a watertight seal; however, with time, this seal may become compromised. Then condensation develops inside the lens, where it is impossible to wipe it away. The light beam is scattered by the water droplets, making it much harder to see at night.
Q: How do I clean the oxidized headlights from the inside?
A: Headlights may be cleaned well using toothpaste and baking soda. Both treatments are sufficiently abrasive to remove the fog without harming or scratching the headlights.
Conclusion
Foggy lenses can reduce the amount of light that headlights project onto the road, reducing your eyesight and other drivers’ ability to see you. You can save a ton of money at the mechanic if you take my advice and clean them from the inside yourself. In addition to no longer putting yourself at risk, your vehicle will look beautiful.
Your car gets a facelift and looks brand new with headlights that have been professionally cleaned. Also, remember to drive carefully!
