For automotive enthusiasts seeking a hands-on approach to maintenance, replacing a clutch can be both a rewarding and cost-effective venture. While it may seem like a daunting task, understanding the fundamentals and following a step-by-step guide can empower enthusiasts to embark on a DIY clutch replacement journey.
Moving forward, we will provide a comprehensive guide for enthusiasts looking to tackle clutch replacement with confidence.
Step 1: Gather the Tools and Materials
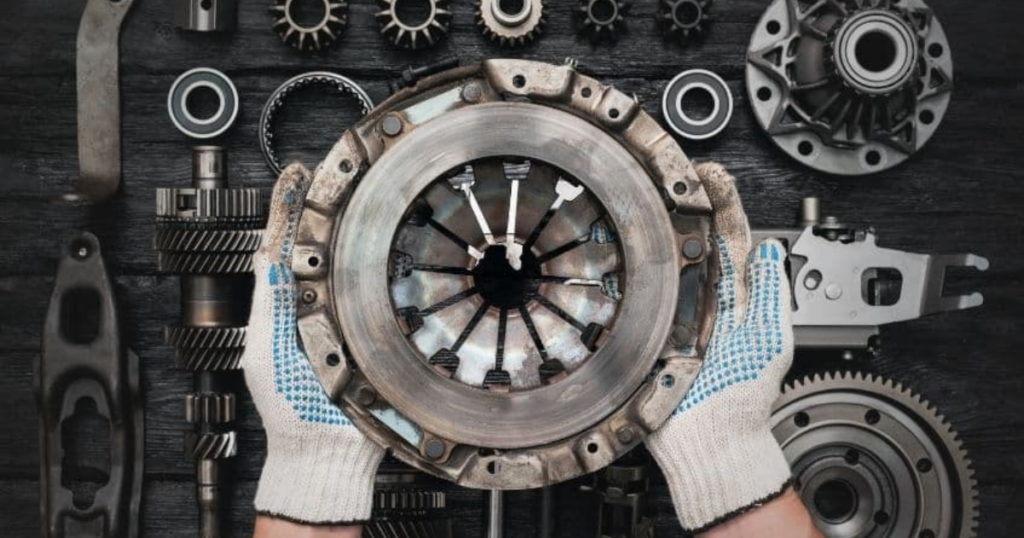
Before diving into the project, ensure you have the necessary tools and materials. This includes a car jack, jack stands, a socket set, a torque wrench, a clutch alignment tool, and, of course, a replacement clutch kit designed for your specific vehicle.
Step 2: Prepare the Workspace
Choose a well-lit and spacious area to work on your vehicle. Ensure you have enough room to move around and access the transmission easily. If possible, use a car lift for additional convenience. Safety is paramount, so use jack stands to secure the vehicle in place and avoid working under an unsupported car.
Step 3: Disconnect the Battery
Begin by disconnecting the vehicle’s battery to ensure safety during the replacement process. This prevents any accidental engagement of the starter motor while you are working on the transmission.
Step 4: Remove the Transmission
To access the clutch assembly, you’ll need to remove the transmission. Start by disconnecting the driveshaft, speedometer cable, and any electrical connectors attached to the transmission. Unbolt the transmission from the engine, support it with a transmission jack, and carefully lower it to the ground.
Step 5: Expose the Clutch Assembly
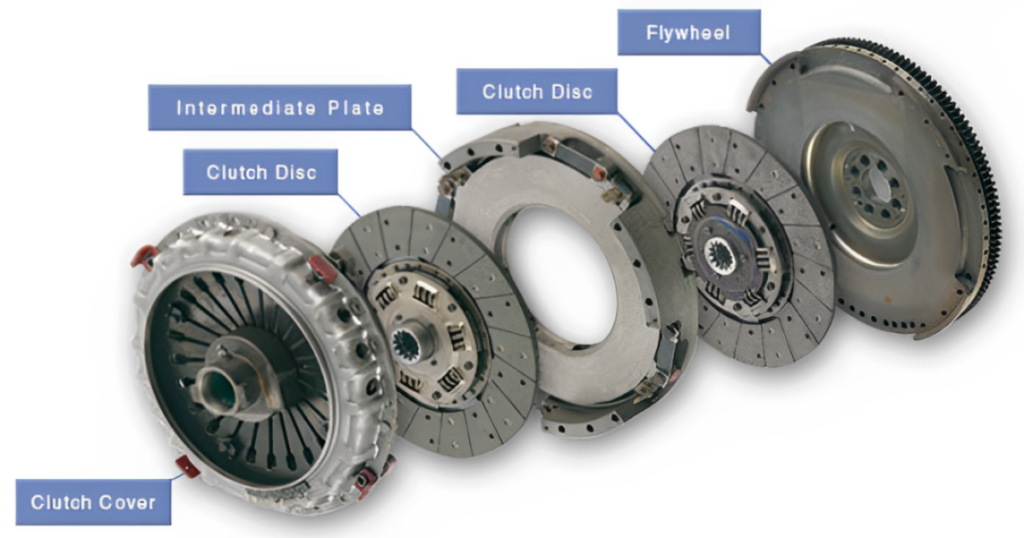
With the transmission out of the way, you’ll have clear access to the clutch assembly. Remove the pressure plate and clutch disc, taking note of their orientation. Inspect the flywheel for any signs of wear or damage.
Step 6: Assess the Pilot Bearing and Release Bearing
Check the pilot bearing and release bearing for wear. If they show signs of damage or excessive wear, it’s advisable to replace them during the clutch replacement process.
Step 7: Clean the Flywheel and Pressure Plate
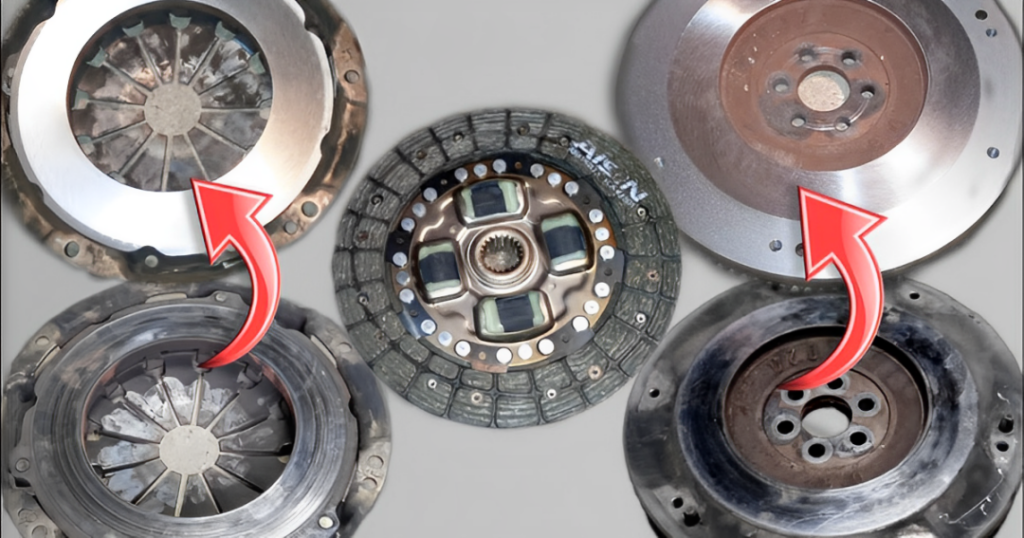
Thoroughly clean the flywheel and pressure plate using brake cleaner. This ensures a clean surface for the new clutch components and promotes optimal performance.
Step 8: Install the New Clutch Kit
Follow the manufacturer’s instructions for installing the new clutch kit. Use the clutch alignment tool to center the clutch disc properly. Tighten the pressure plate bolts evenly and to the specified torque.
Step 9: Replace the Pilot Bearing and Release Bearing
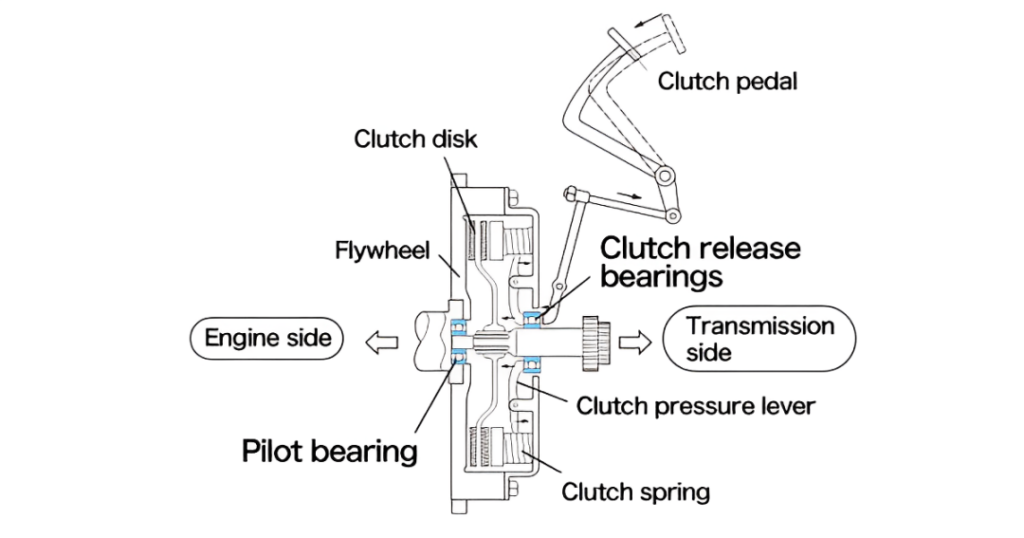
If the pilot bearing and release bearing are worn or damaged, replace them with new components. Apply a small amount of high-temperature grease to the pilot bearing to ensure smooth operation.
Step 10: Reinstall the Transmission
Lift the transmission back into place using the transmission jack. Reconnect the driveshaft, speedometer cable, and any electrical connectors. Carefully align the transmission with the engine and secure it in place by tightening the bolts to the specified torque.
Step 11: Bleed the Clutch Hydraulics
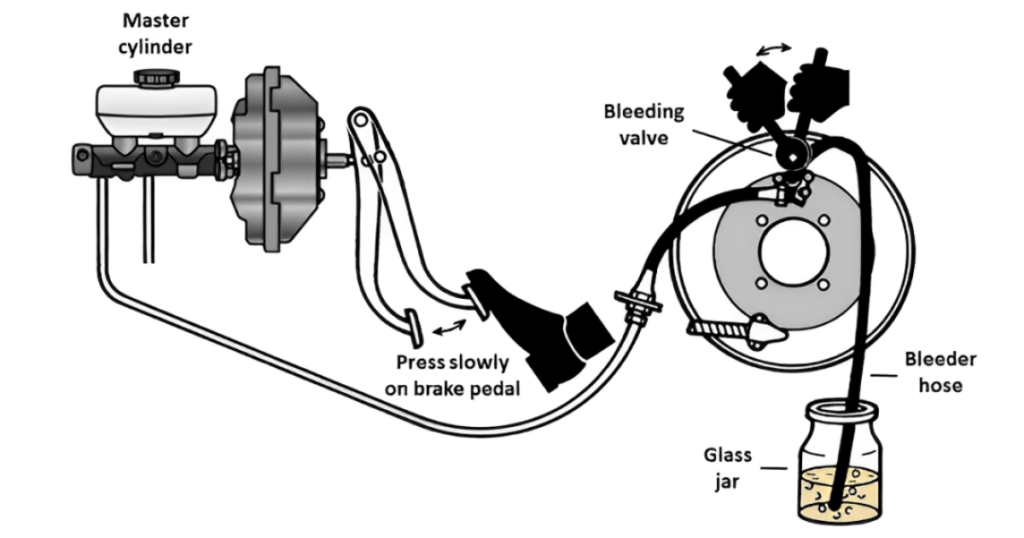
If your vehicle has a hydraulic clutch system, you’ll need to bleed the system to remove air and ensure proper clutch engagement. Refer to your vehicle’s service manual for specific bleeding procedures.
Step 12: Test the Clutch Operation
With the clutch replacement complete, it’s time to test the system. Start the vehicle and engage the clutch to ensure smooth and responsive operation. Pay attention to any unusual noises or vibrations.
Step 13: Reconnect the Battery
Once you’re satisfied with the clutch’s performance, reconnect the vehicle’s battery. This restores power to the electrical systems.
Step 14: Take a Test Drive
Before considering the job complete, take your vehicle for a test drive. Pay attention to clutch engagement, shifting smoothness, and overall drivability. If everything feels right, congratulations—you’ve successfully completed a DIY clutch replacement!
Conclusion
Embarking on a DIY clutch replacement can be a challenging but immensely satisfying project for automotive enthusiasts. By following this step-by-step guide and exercising patience and precision, you can save money on labor costs and gain a deeper understanding of your vehicle’s mechanics.
Remember to consult your vehicle’s service manual for specific instructions and torque specifications, and don’t hesitate to seek professional assistance if needed. With the right tools, knowledge, and a bit of elbow grease, enthusiasts can elevate their automotive skills and take pride in a clutch replacement job well done.
For a video guide on DIY assembly replacement, check out the video below.

