Regular inspections and scheduled maintenance should become routine if you want your vehicle to last a long time. This will not only save you money on costly repairs but also ensure an optimal driving experience.
Ensuring that the brake fluid in your vehicle is at the correct level is crucial for maintaining its performance. It is important to know how to properly check the brake fluid to do so.
This article will cover the process of checking brake fluid in a Toyota Corolla and various other vehicle brands and models.
Step-by-step Instructions on How To Inspect Brake Fluid

The initial step is to find the brake fluid reservoir in your vehicle when you need to check the brake fluid level or if it is hot or cold. You may be wondering, where is the brake fluid in my car? The placement of the brake fluid reservoir varies depending on the make and model of your vehicle.
In many instances, the brake fluid reservoir is located on the driver’s side in the engine compartment, close to the firewall. Typically, it is a plastic container positioned at the top and linked to the brake cylinder.
If the brake fluid level is low, air can enter the system and interfere with its ability to brake effectively. Maintaining the brake fluid at the recommended level is essential for proper functioning.
The following are the instructions for inspecting the brake fluid:
Step 1: Clean the Brake Fluid Reservoir
Begin by cleaning the brake fluid reservoir by wiping away any dirt and grime from the reservoir cover to prevent it from falling inside when opened. This is necessary to avoid potential damage to the internal seals that could lead to brake system failure.
Step 2. Remove the Reservoir Cap
If your vehicle has a plastic brake fluid reservoir, twist off the cap to open it. If it has a metal reservoir, use a screwdriver to remove the retaining clip. It is important not to keep the brake fluid exposed for an extended period as it can absorb moisture.
Moisture stops the brake fluid from settling in hydraulic parts and causing rust. The fluid should not be exposed for longer than 15 minutes.
Step 3. Inspect the Fluid Levels
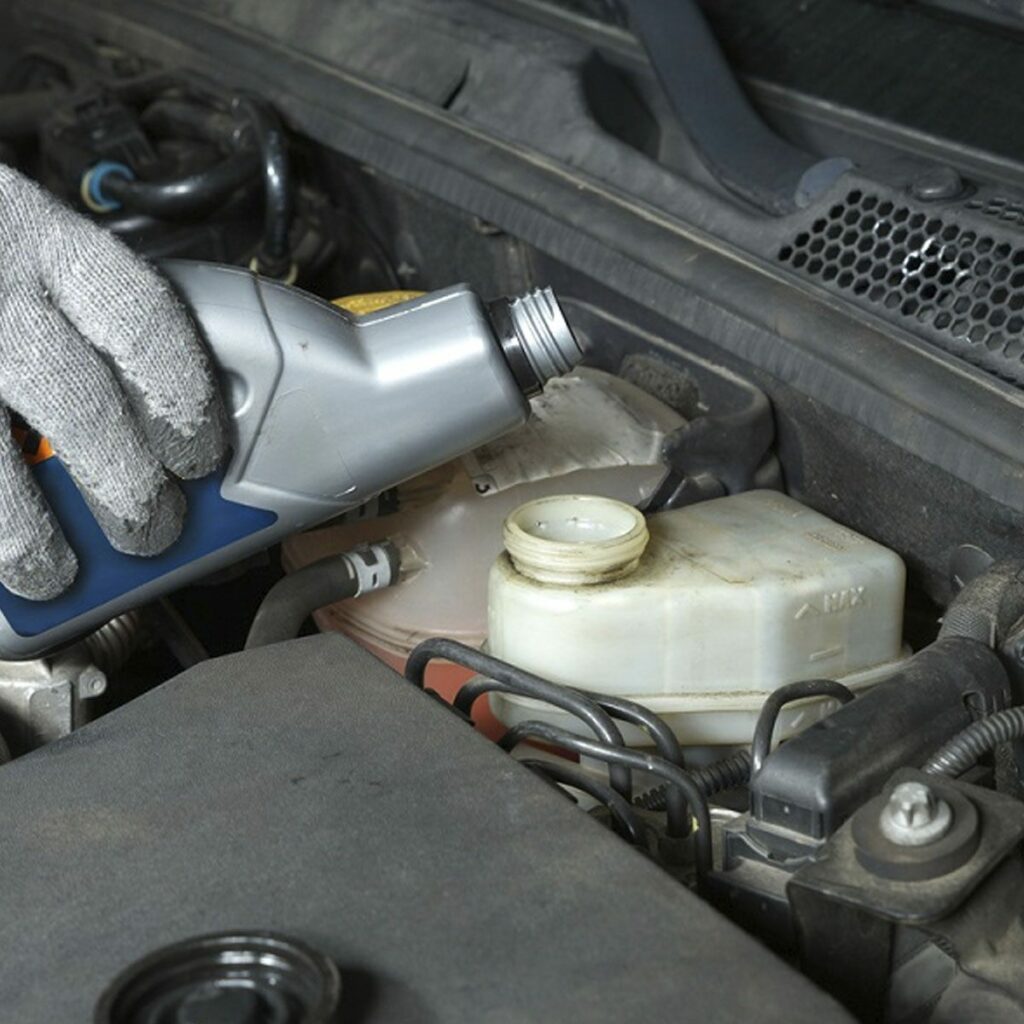
Make sure that the brake fluid is at or near the ‘MAX’ mark. If it is close to or below the ‘MIN’ level, it is important to know how to properly add brake fluid.
The choice of brake fluid will vary depending on the type of vehicle you have. The preferred brake fluid choices are either Dot 3 or Dot 4. If the brake fluid reservoir is lacking fluid, it is important to refill it with the correct brake fluid or seek assistance from a professional.
Step 4. Inspect the Color of the Fluid
Over time, brake fluid begins to degrade, losing its ability to resist moisture. This results in the fluid absorbing small amounts of moisture, causing corrosion of components and a decrease in brake performance.
This will help determine if the fluid requires changing. If the fluid appears brown, it indicates that a change is necessary. If you are familiar with changing brake fluid, you can easily perform this task at home. Otherwise, it is best to bring your vehicle to a professional mechanic for brake fluid bleeding.
Gain further information on the colour guide for brake fluid. Certain ABS systems in vehicles may need you to press the brake pedal 25-30 times before examining the fluid. However, in general, most cars will require you to pump the brakes after adding brake fluid.
Important Factors to Consider When Inspecting Brake Fluid

Be careful not to spill brake fluid on painted surfaces. In case of brake fluid accidentally spills on a painted area, rinse it off with water and then wipe it dry with a clean cloth.”
Prevent oil or grease from entering your brake fluid. Oil or grease is incompatible with brake fluid.
Frequently Asked Questions (FAQs)
Q 1: Is it necessary to check the brake fluid while the car is running?
There is confusion among people regarding whether to check brake fluid hot or cold, as some fluids require checking when hot while others are checked when the vehicle has cooled down.
Q 2: Is it possible to simply pour brake fluid into your car?
It is advisable to check the level and colour of the brake fluid before adding it to the vehicle. If the brake fluid is below the ‘MAX’ line, it should be topped up until it reaches the ‘MAX’ line, being cautious not to overfill.
Q 3: Is it safe to drive with low brake fluid?
Driving with low brake fluid is hazardous and should be avoided at all costs. The appearance of the brake light on your dashboard is often a result of low brake fluid and worn brake pads.
Low brake fluid could be an indication of worn brake pads, so it is important to regularly check your brake pads and shoes when the fluid level drops below the ‘MAX’ line.”
Q 4: How frequently should I inspect my brake fluid?
It is recommended to check your brake fluid each time you get an oil change. This simple task can prevent potential brake problems. Many vehicles have a plastic reservoir that allows you to easily check the fluid level without removing the cover. If the fluid level is not visible through the reservoir, you will need to take off the cover.
Conclusion
In conclusion, Discovering that the brake system is not functioning properly while driving at high speeds can be incredibly terrifying for a driver. It is essential to understand the proper method of checking brake fluid as it is crucial for maintaining the efficiency of your brakes over time.


