The ability to operate a test light is one that will be useful at some point. One way to make sure your car’s circuits are getting power is to use a test light, which goes by a few different names: test lamp, main tester, and voltage tester. Then why is a test light necessary?
How Many Types of Test Light Are There?

Knowing what kinds of test lights are available is the first step in becoming an expert user of these tools. There is a wide variety of test lights available; therefore, it is important to understand their purposes in order to select the most appropriate vehicle test light. While some are more general-purpose, others do a wide variety of electrical tasks. Presented here are a selection of the test flights currently available.
- Non-Contact Voltage Testers
- Neon Voltage Testers
- Plug-In Circuit Testers
- Continuity Tester
- Multimeter
- Solenoid Voltage Tester
- Digital Clamp Meter
How To Use A Test Light
If you know your way around a test light, you’ll be able to tell when critical electrical parts have failed. Various situations call for the employment of test lights, and we’ll go over those below.
Positive Voltage Test
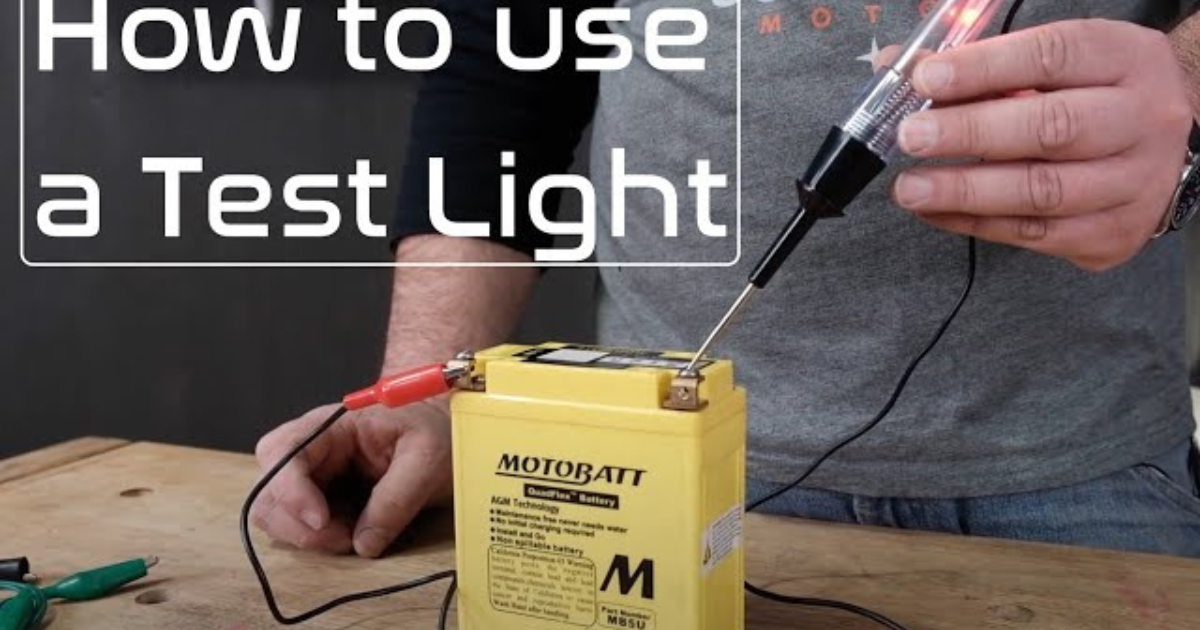
Verifying the functionality of the test light should be the initial objective. To do this, you’ll need to secure the test light to a stable ground. Here, the ground source is the exposed metal of the vehicle’s frame. Another option would be to use the negative terminal of the battery. To find a positive voltage source, such as a fuse or the positive terminal of the vehicle battery, gently touch it with the probe. Everything is OK to go if the test light comes on.
Using Test Light On Fuses
Using a test light, you may check to see which fuses in your vehicle are active. Please follow these procedures. Navigate to the panel housing your vehicle’s fuse box. To accomplish this, you may need to consult the owner’s handbook. After that, take off the cover to see where the fuses are located.
First things first: turn off the engine. The next step is to secure the test light’s clip to a non-painted metal surface, such as a bolt, in order to provide a good ground. As an additional excellent alternative, you might use the negative terminal of the battery. Where the panel housing the car’s fuse box is located determines everything
Checking for Short to Ground with Test Light
Perhaps you’ve noticed that your vehicle’s power is starting to dwindle. When troubleshooting other parts of its functionality fails, the next step is to inspect the electrical system. The point is to make sure the electrical resistance is correct; checking the ground circuit of your vehicle is the easiest approach to achieve this. This is the way to do it.
Make sure the positive circuit works. You can proceed to check the ground circuit if this is determined. This can be accomplished by attaching the positive end of the test light—ideally a circuit tester—to one end of the device.
After that, you need to make sure that the other end of the tester is touching the component’s ground wire. If the test light comes on, it means the ground circuit is good; if it doesn’t, you may have to look elsewhere for the source of the higher resistance.
Conclusion
Having a set of test lights on hand is a smart move. Having the ability to operate a test light is an essential skill for anyone who owns or uses a vehicle. This is due to the fact that it facilitates the easy identification of the vehicle’s electrical system and its components. When the issue is not related to the electrical system, you will recognize it. So, the next time your vehicle breaks down, you should be able to narrow down the possible causes with the help of your test light.


